How to collect guest photos with a QR code
A wedding, a Raya open house or a company dinner: setting up takes a few minutes, and on the day your guests do the rest. Screens below are from a real PixCherry album.
For hosts
- Step 1
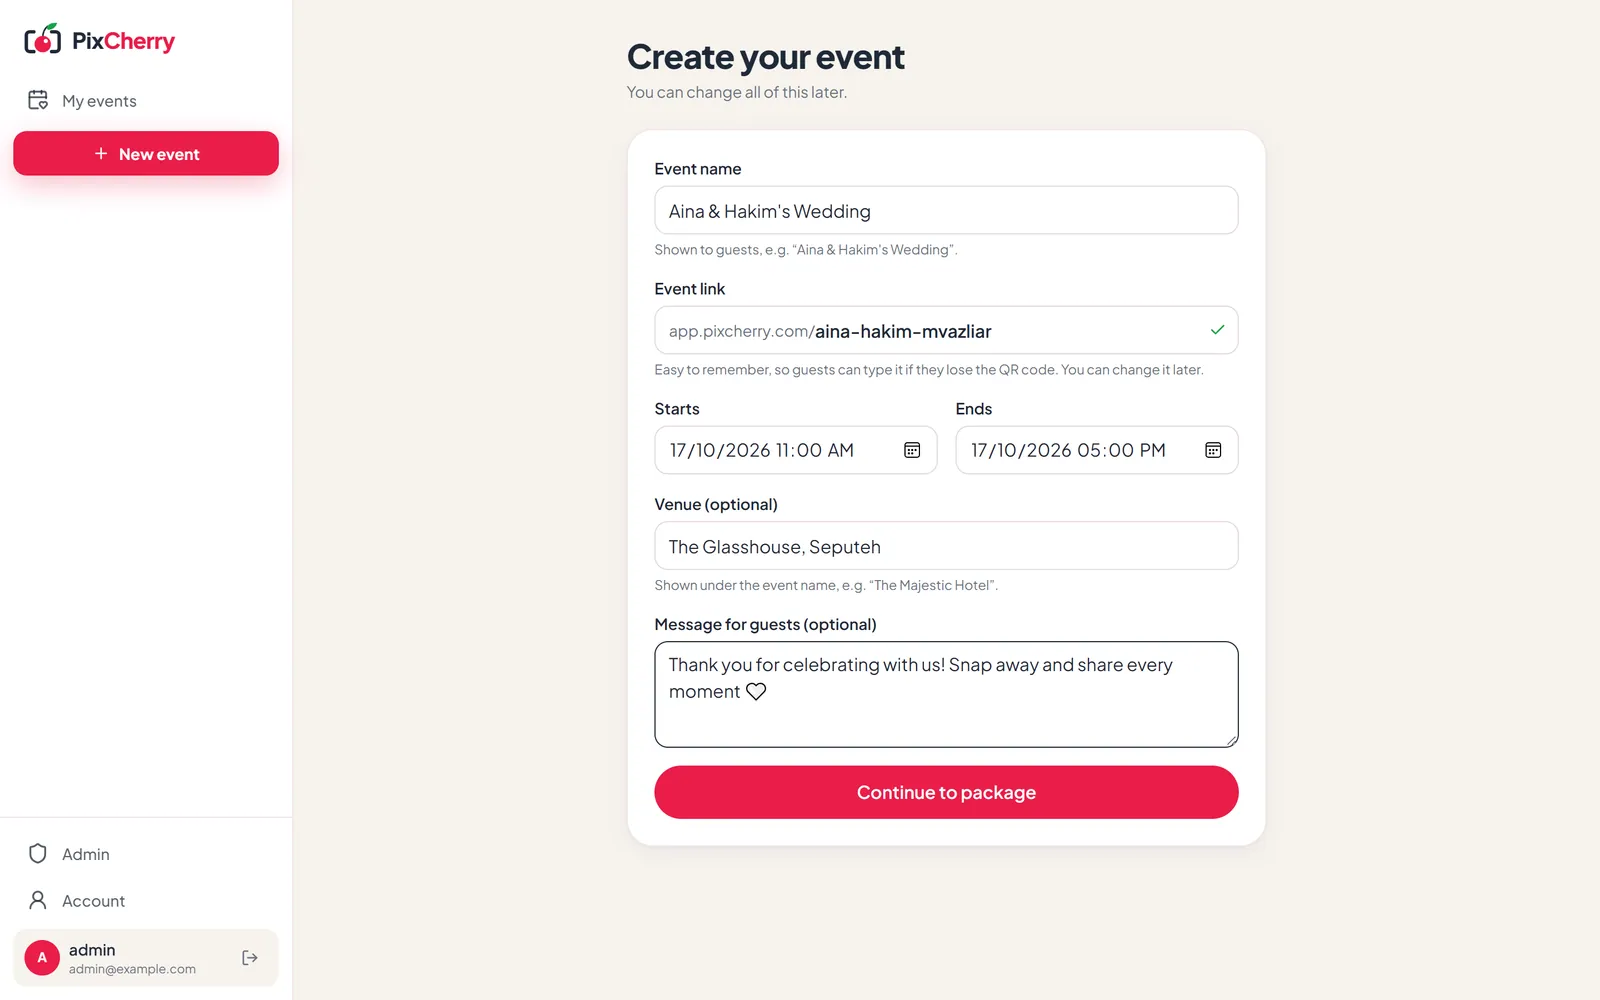
Create your event
Log in with your email (we send a 6-digit code, no password to remember).
Type the event name, date and time, venue and a short message for guests. Pick a link people can read, like app.pixcherry.com/aina-hakim. Set the real start time: the album opens to guests then, and the dates are fixed once the event starts.
- Step 2
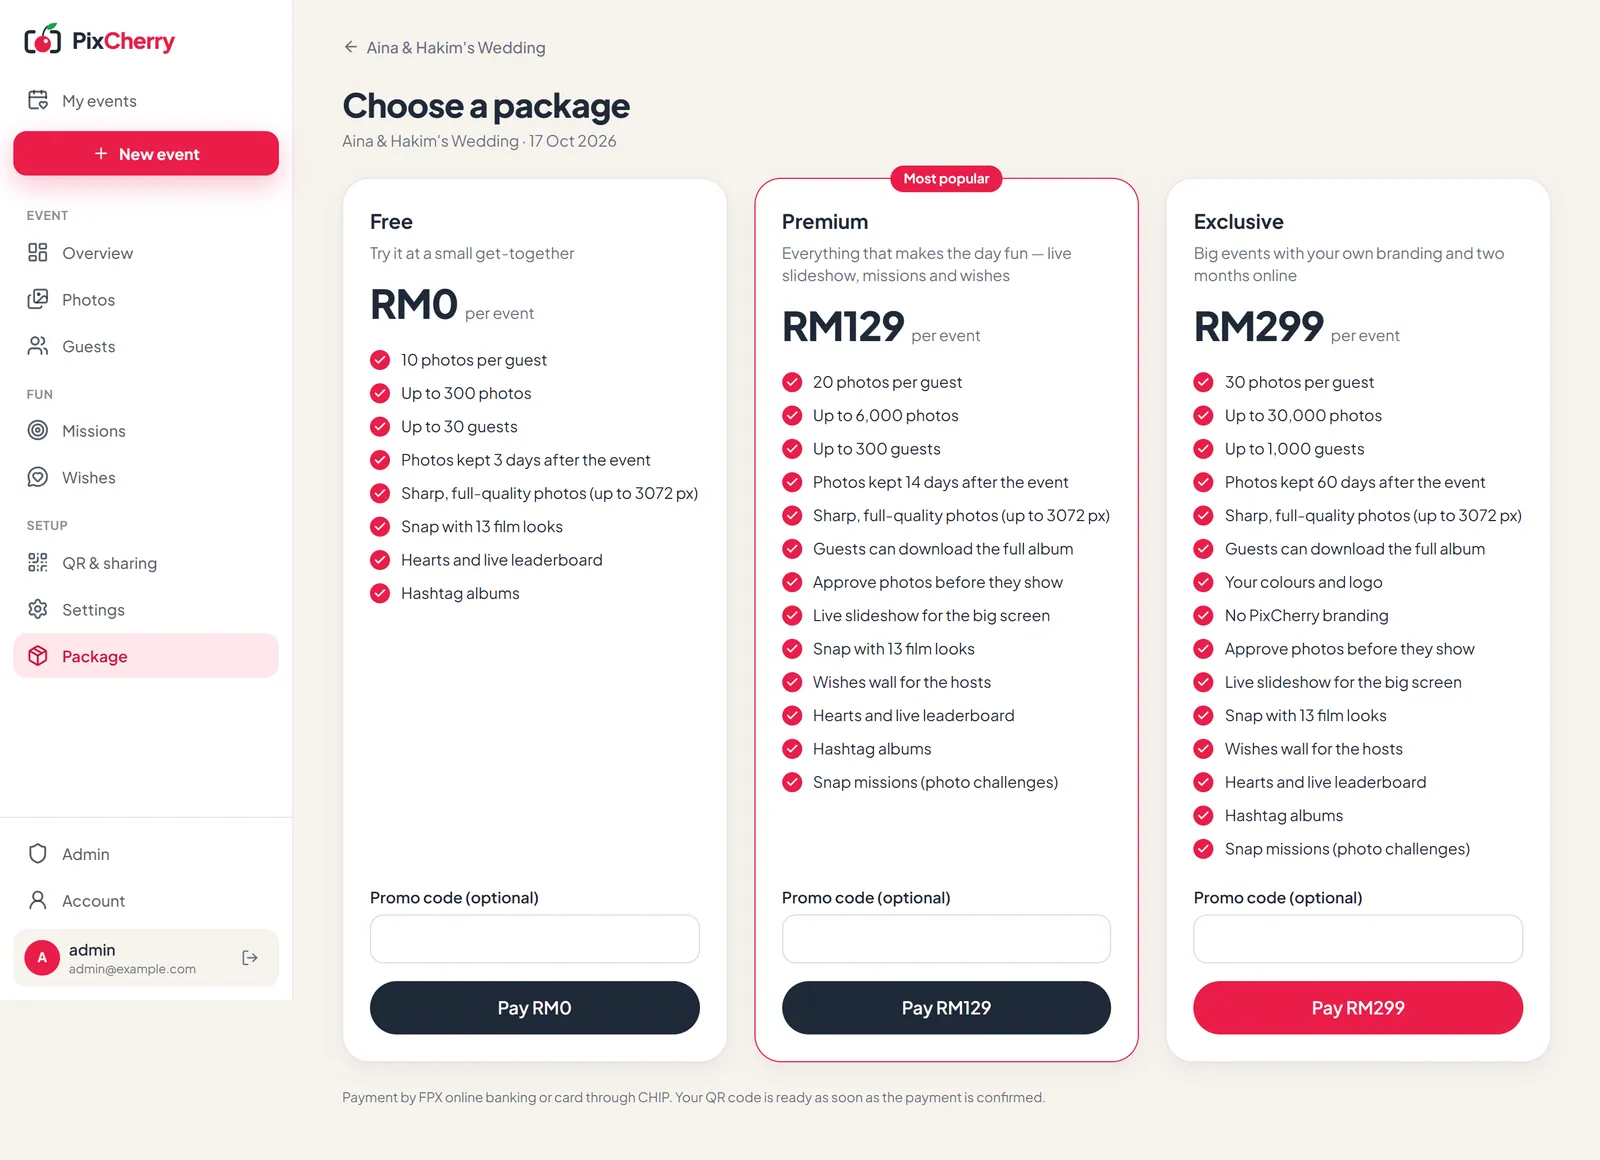
Choose a package and pay once
Every package shows exactly what you get: how many guests, photos per guest, how long photos stay online, and which features are included.
Pay online through CHIP (FPX online banking or card). No subscription. The Free package works for small get-togethers.
- Step 3
Make it yours
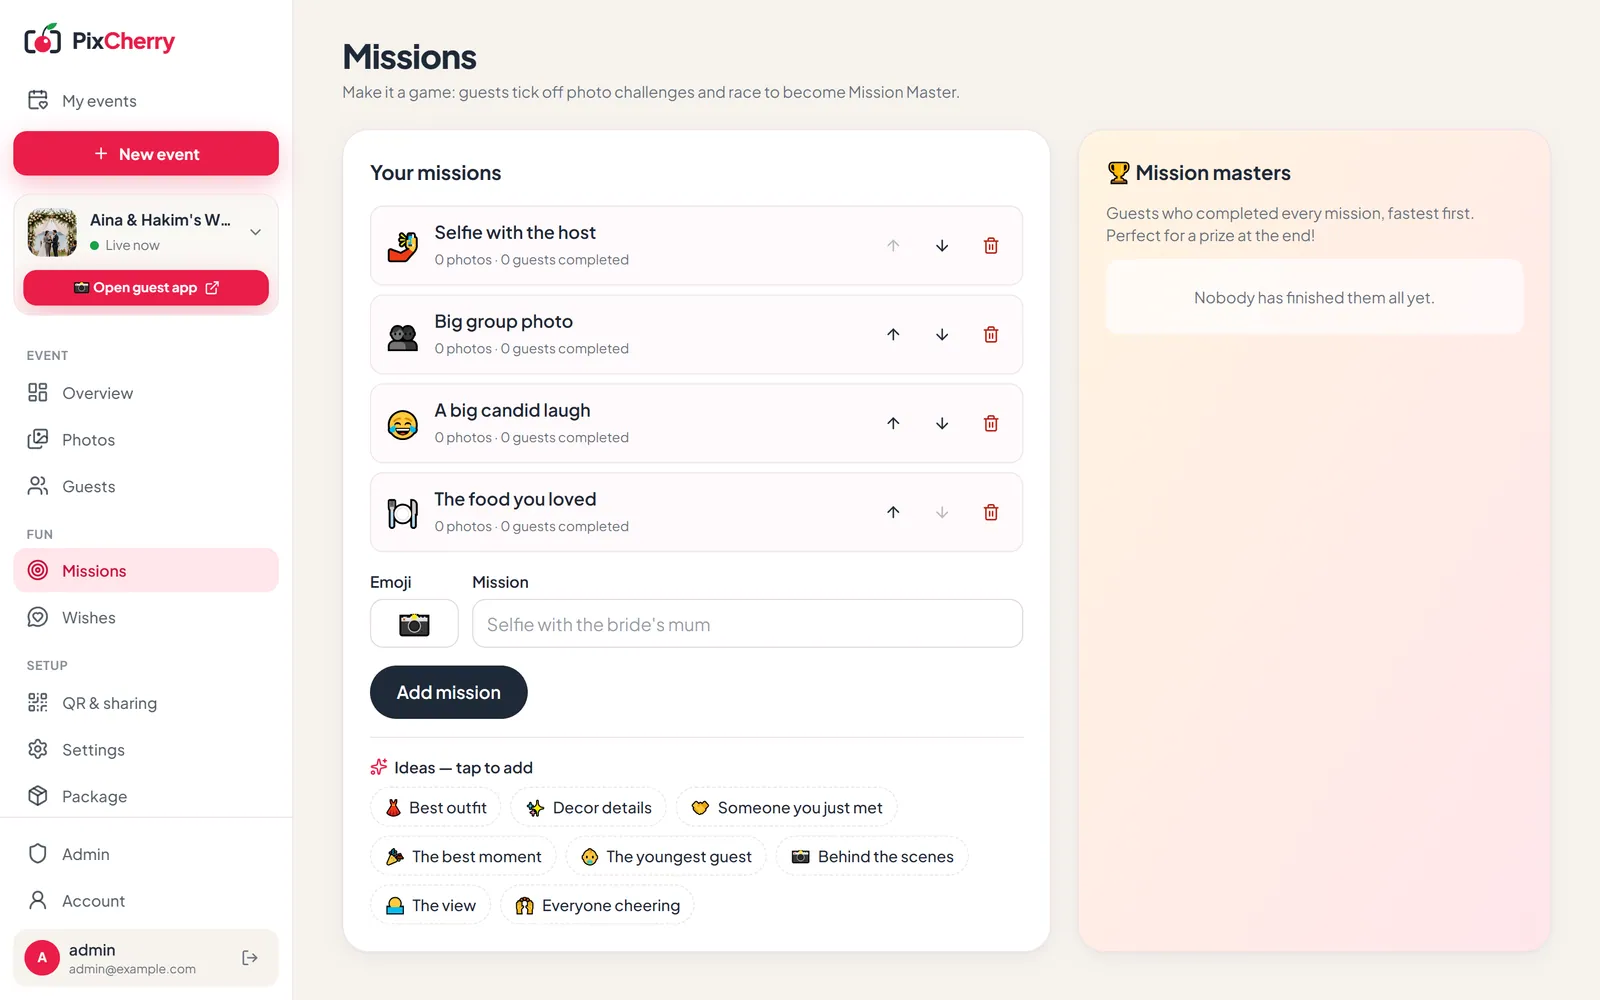
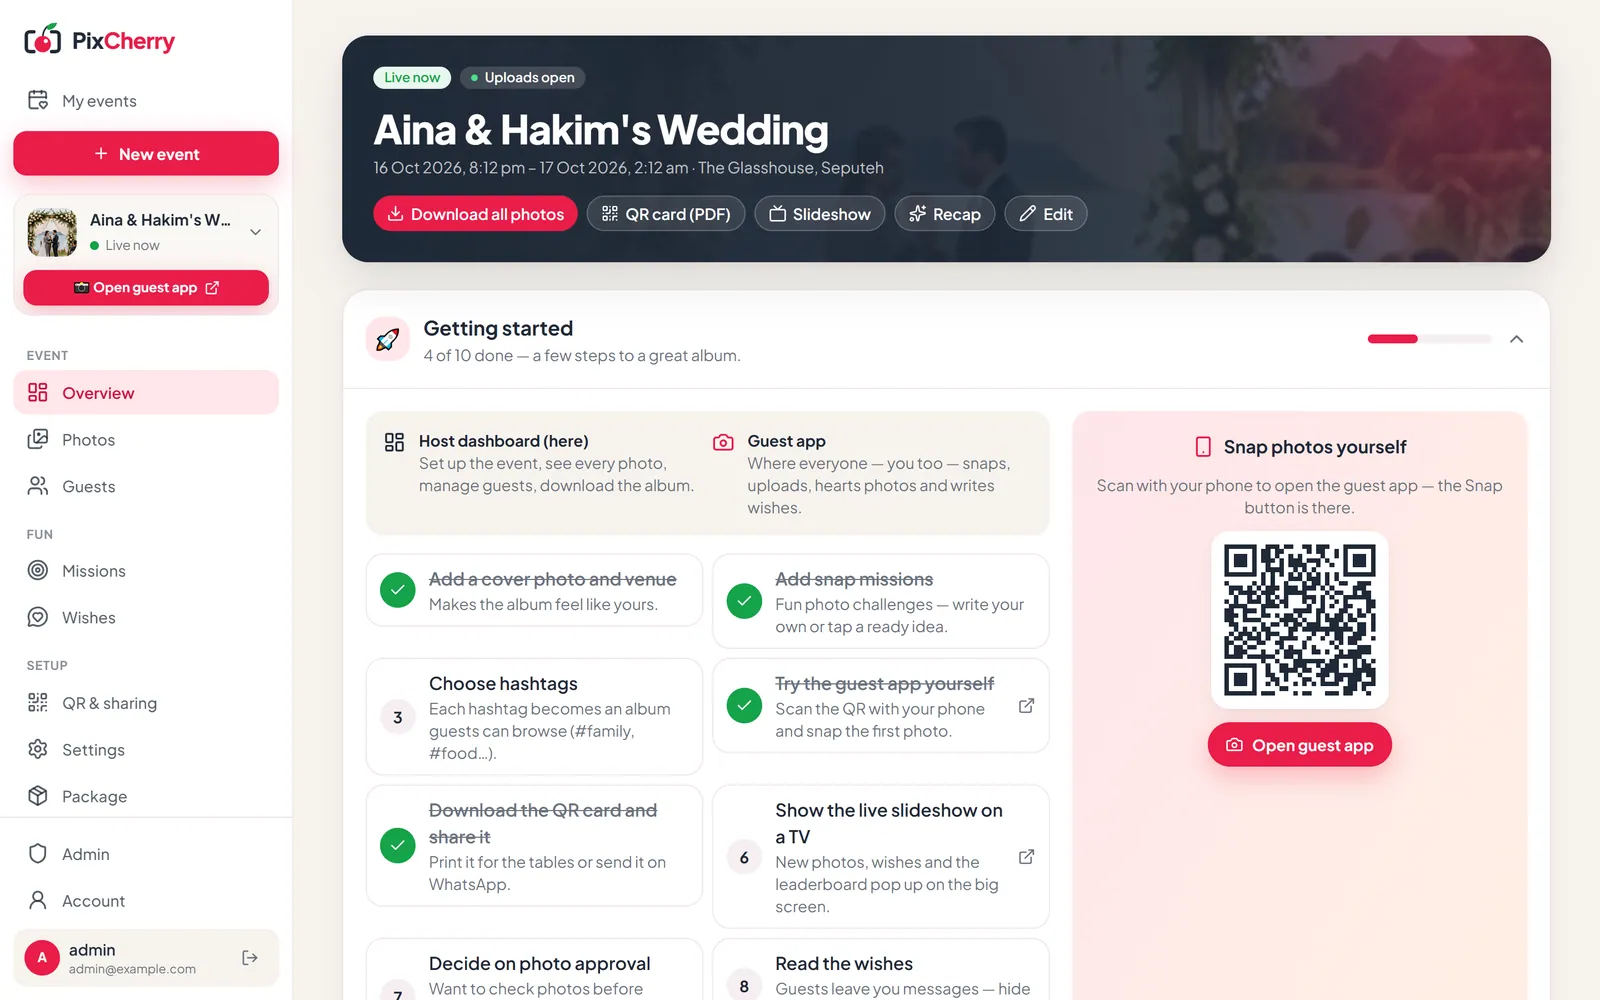
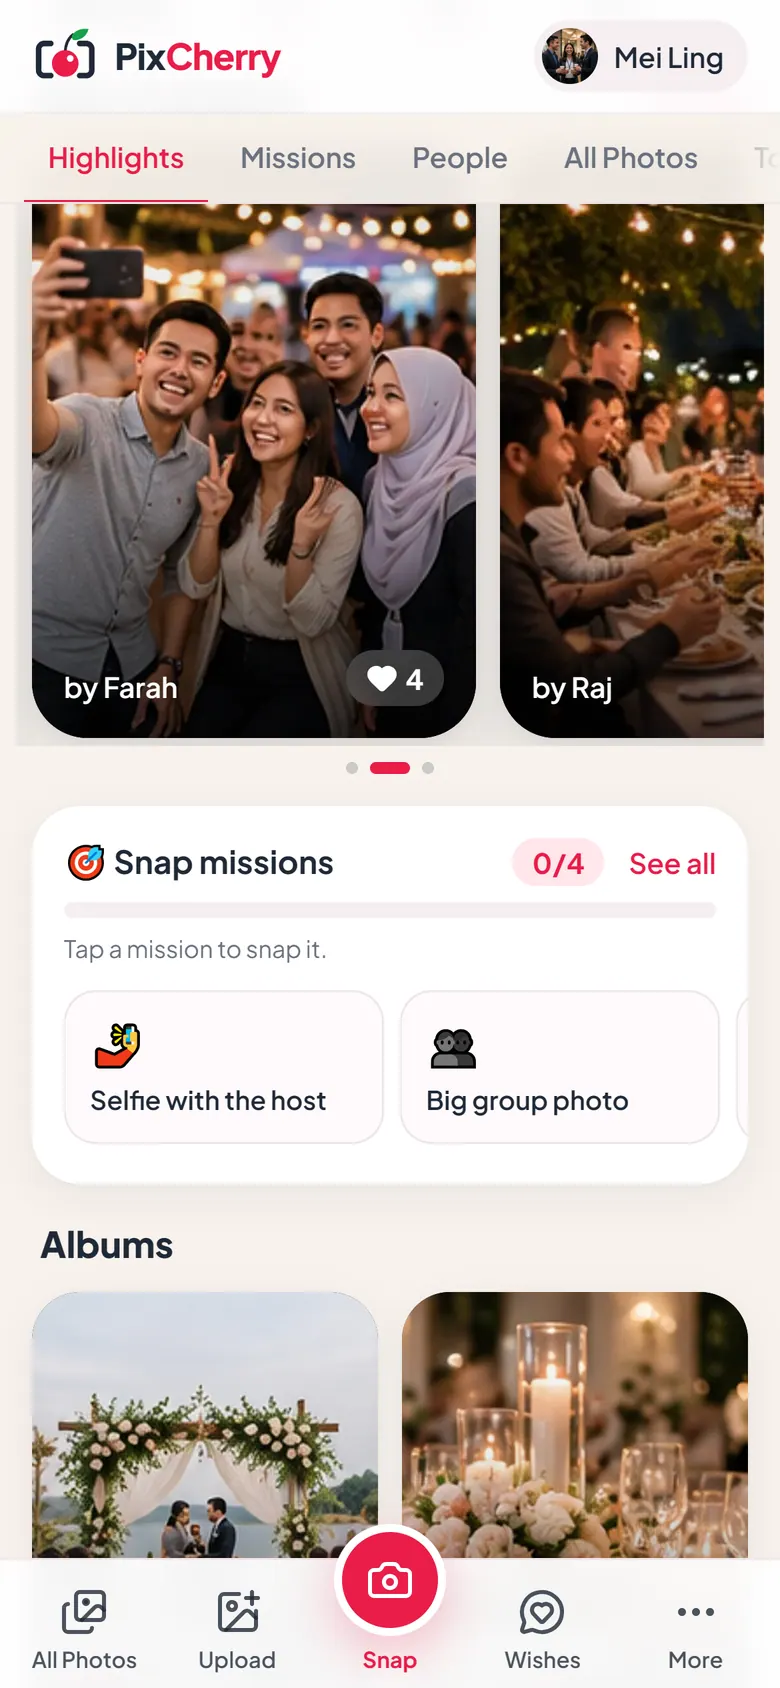
Add a cover photo. Tap a few ready-made snap missions ("Selfie with the host", "Big group photo") or write your own. Choose hashtags guests can tap.
Decide how guests add photos: snap and upload, snap only (the Snap camera, no gallery button), or closed.
- Step 4
Share the QR code
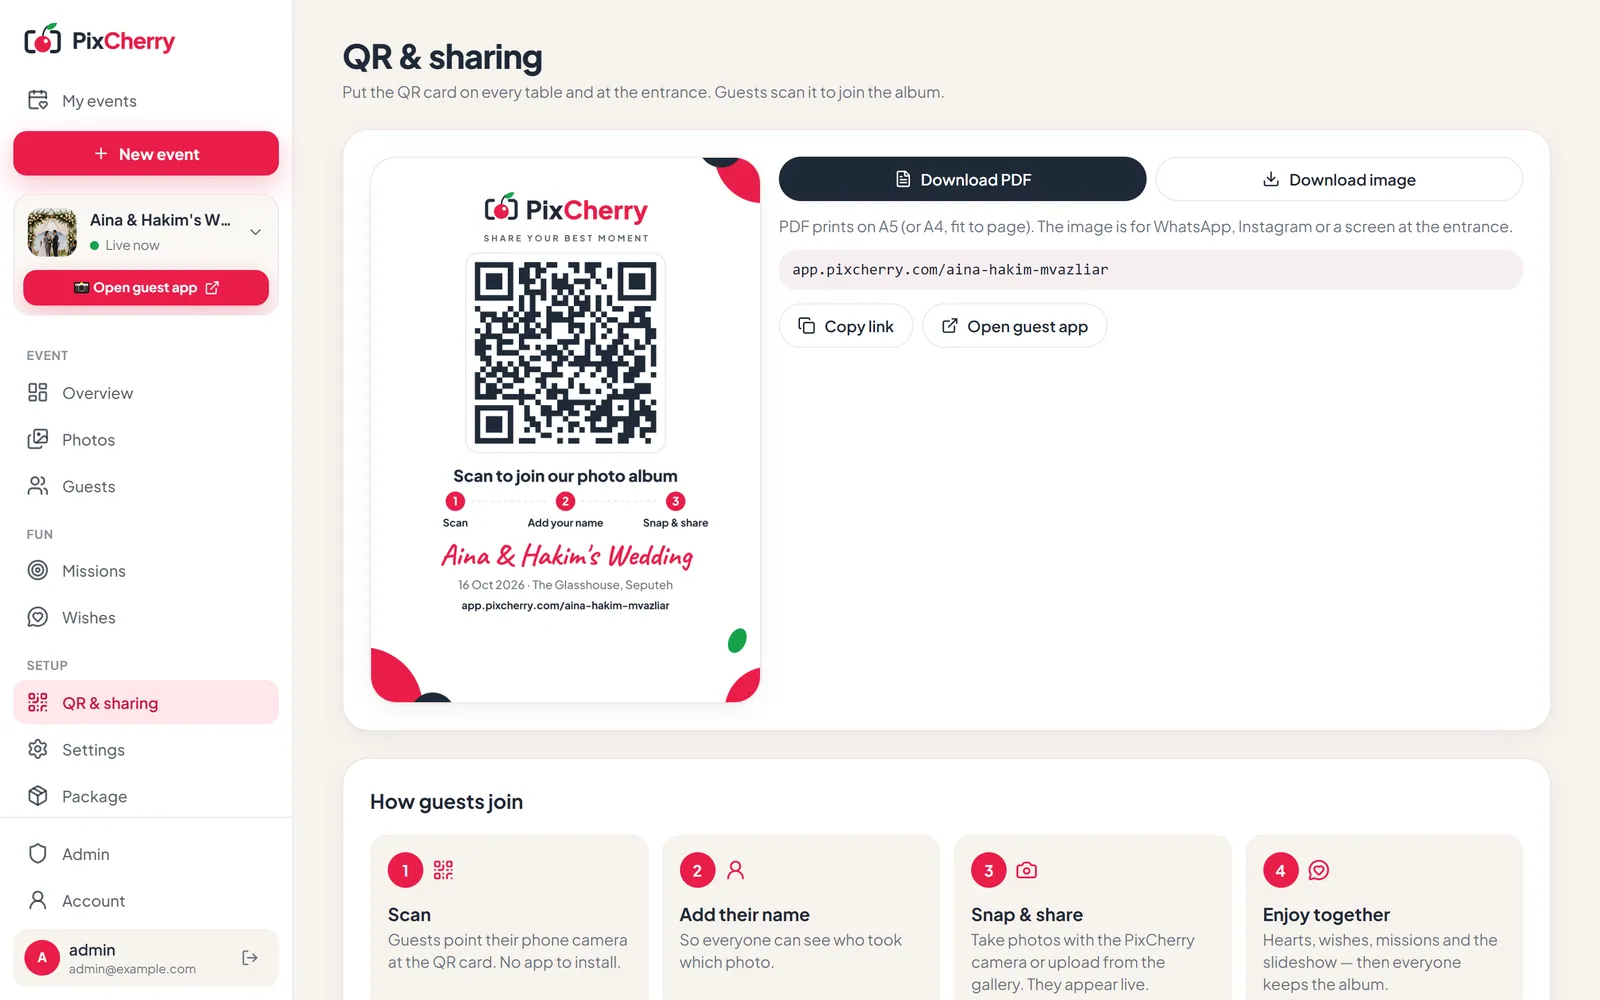
Download the QR card as a PDF to print, or as an image to show on a screen or send in WhatsApp. It tells guests what to do in three short steps.
Put it on tables, at the entrance, or on the slideshow screen. Until the event starts, guests who scan it see a countdown; at the start time the album opens.
- Step 5
During the event
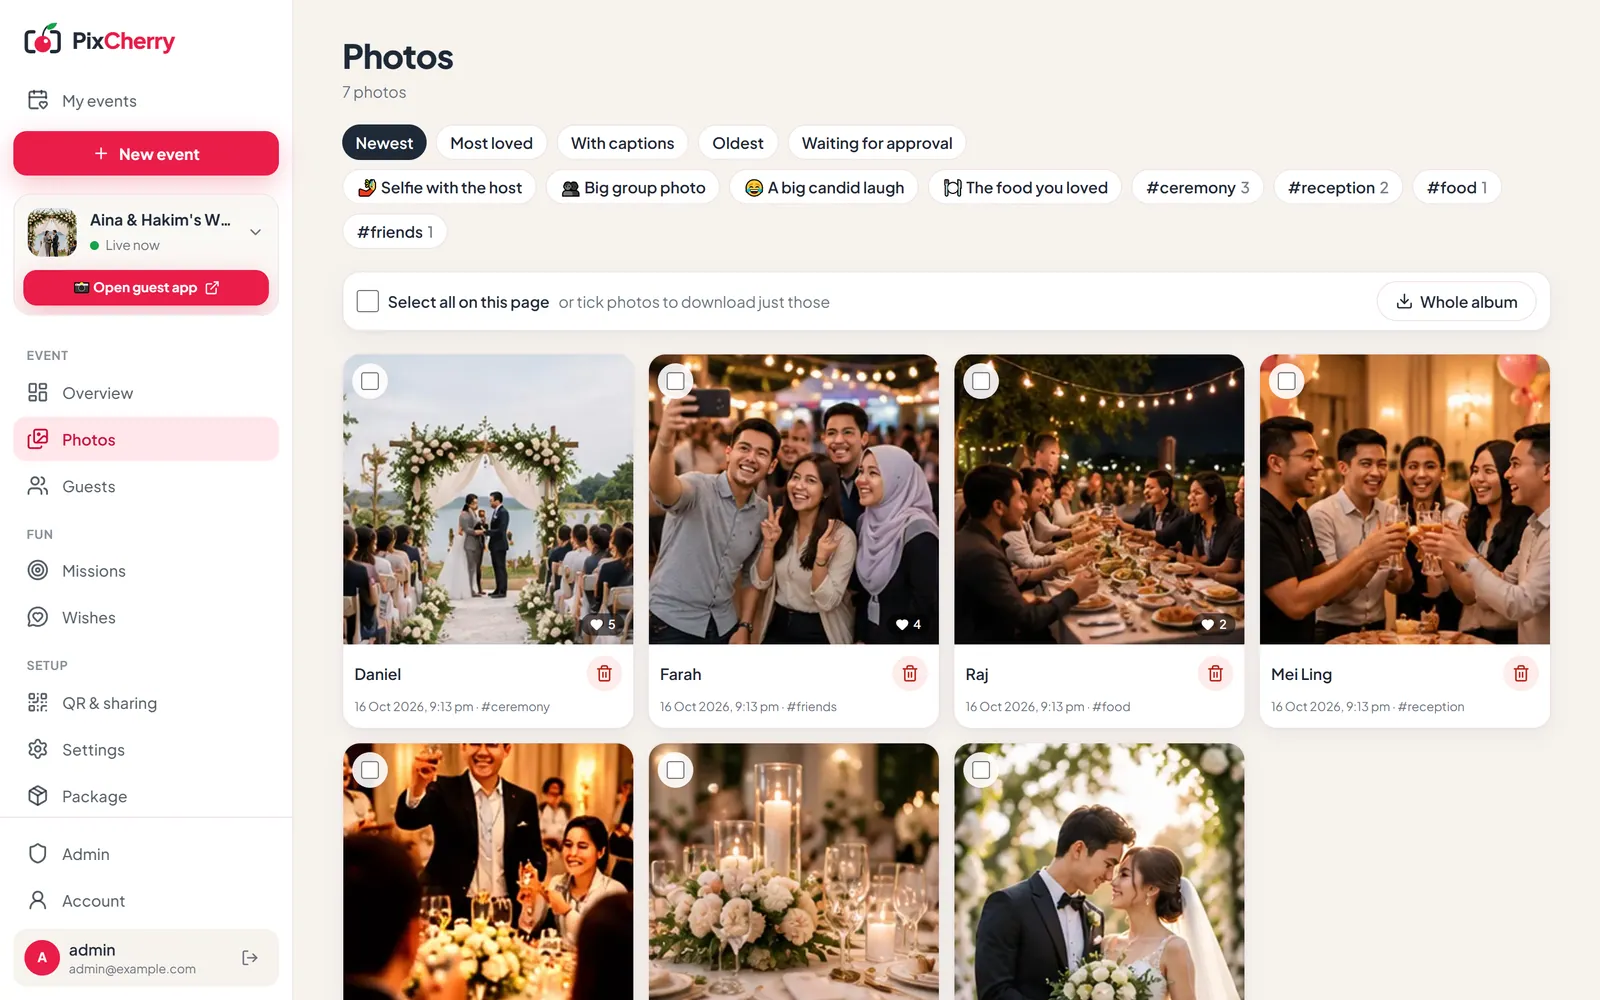
Watch photos arrive on your dashboard. Open the live slideshow on a TV or projector: new photos and wishes appear by themselves.
Every photo is checked automatically, and anything that looks like nudity is hidden until you look at it. Guests can report a photo too, and you can remove photos or block a guest any time.
- Step 6
After the event
Download the whole album as one ZIP, sorted into a folder per guest, or tick just the photos you want. Guests get a recap of the day.
Your event page shows the date photos will be deleted. We email you before that, and you can add more days if you need them.
For guests
Send this part to anyone who asks “how do I upload?”
- Step 1
Scan the QR code
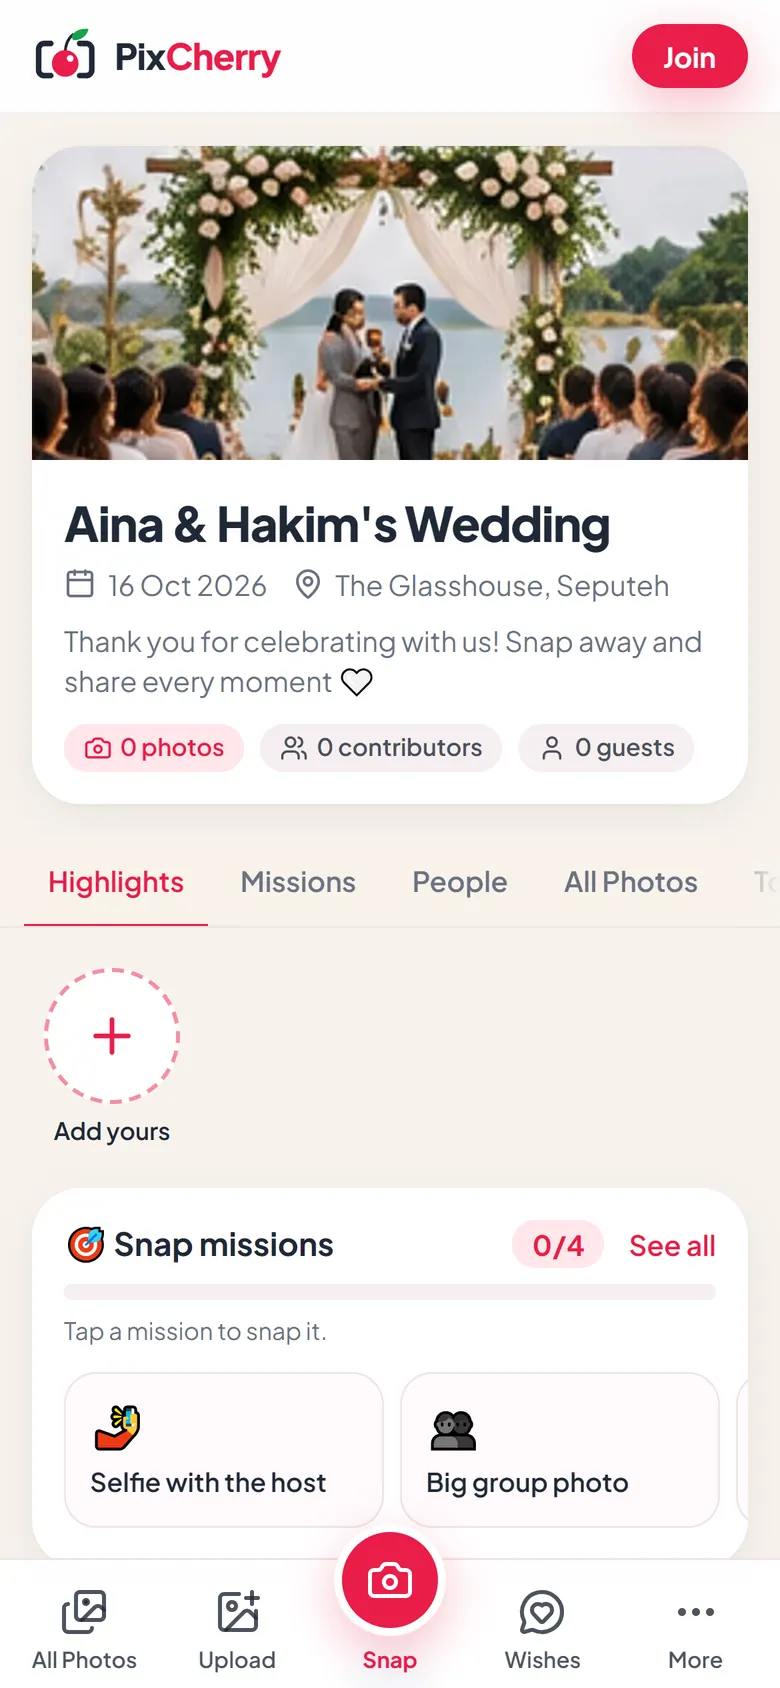
Use the phone camera. The album opens in the browser — nothing to install, no account.
- Step 2
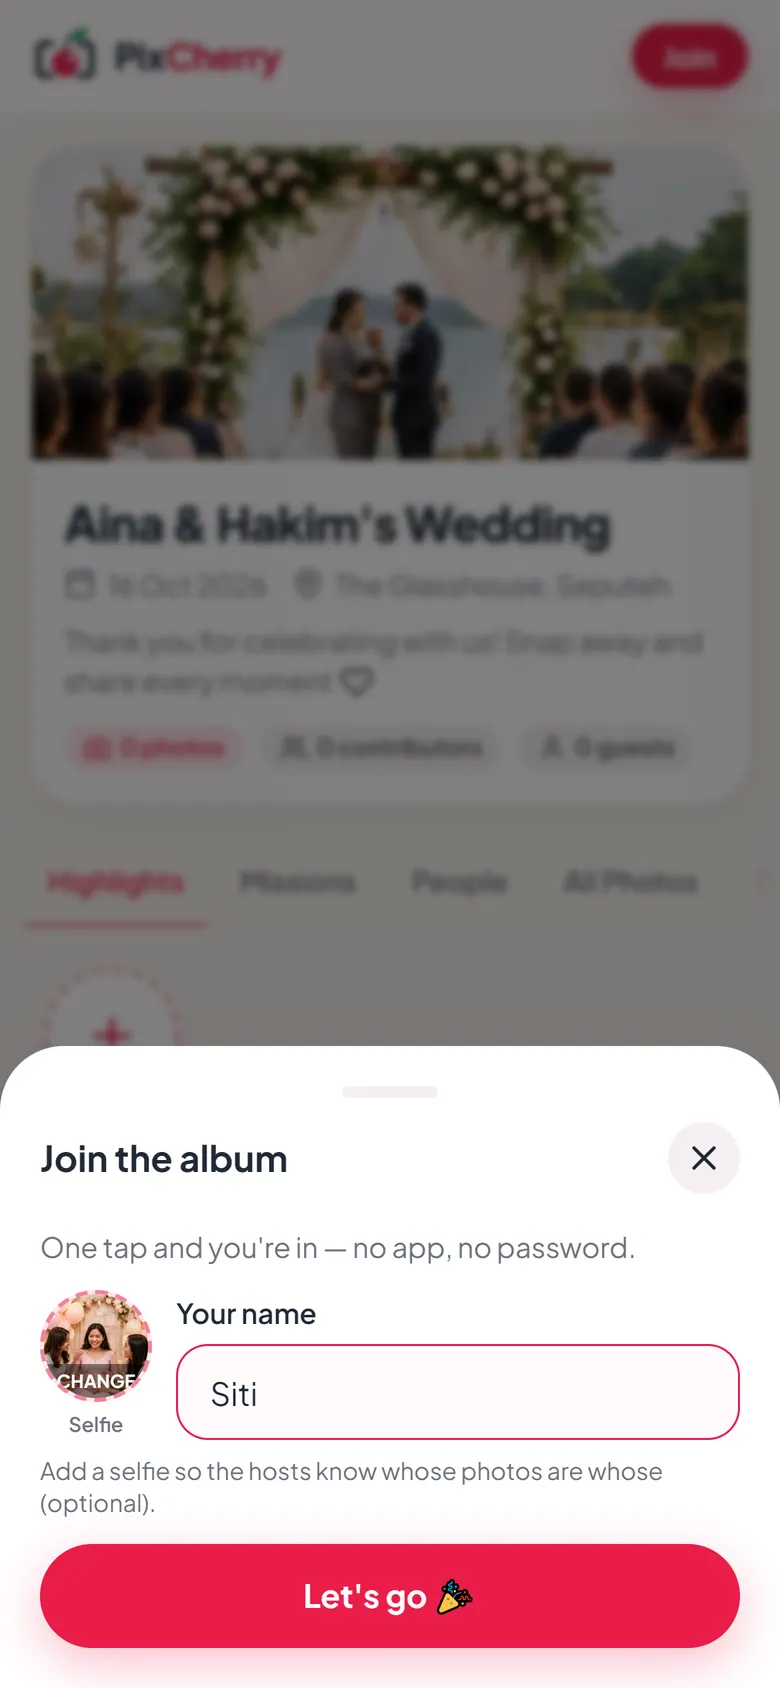
Add your name (and a selfie, if you like)
Your name goes on your photos so the hosts know who took them. The selfie is optional.
- Step 3
Snap or upload
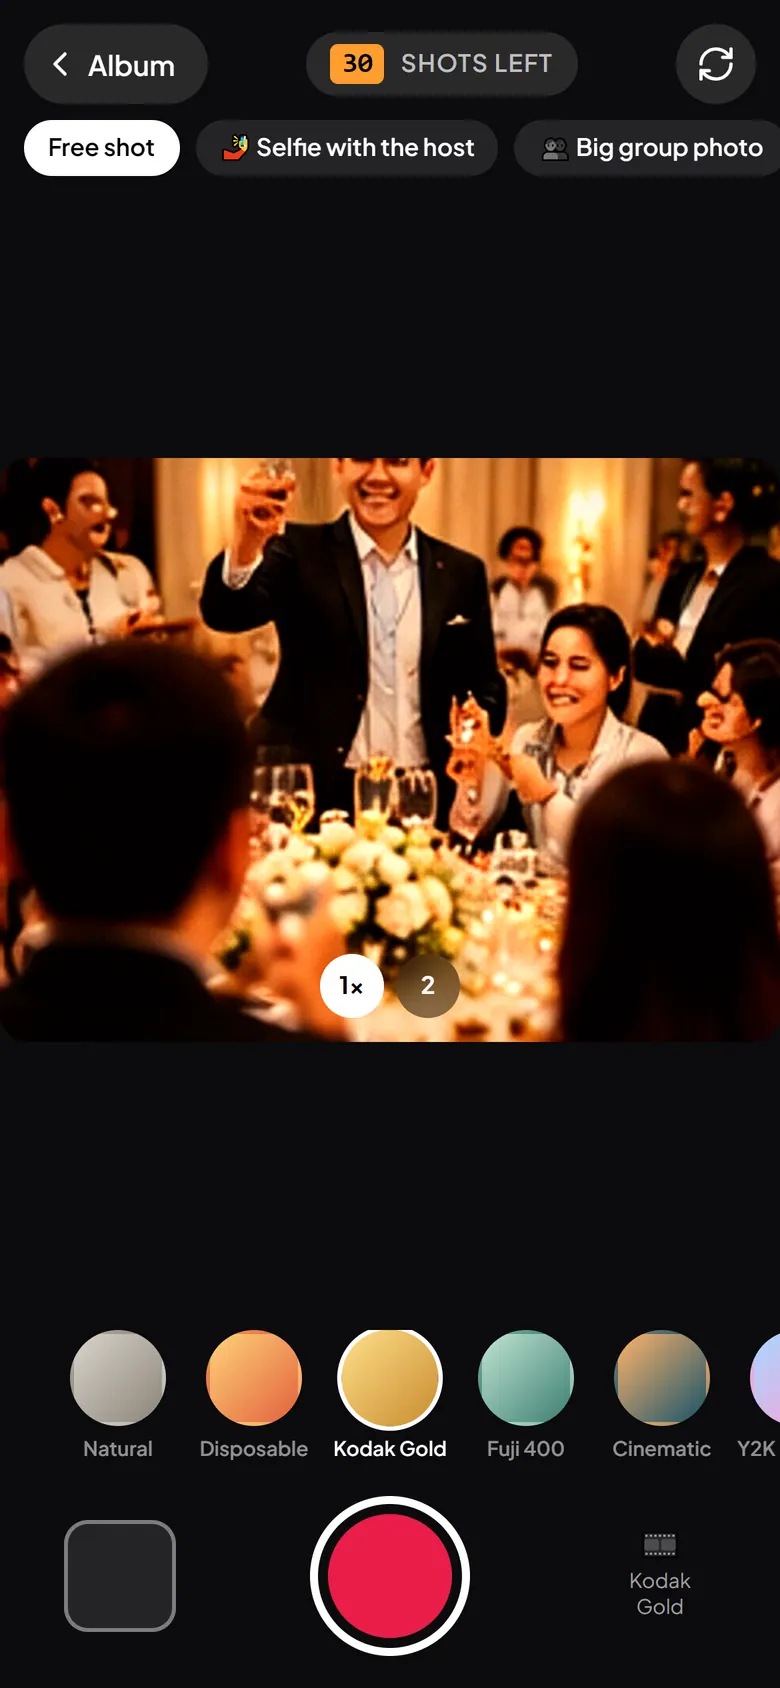
Snap with the PixCamera: pick a film look, take the shot, add hashtags and a caption. Or upload photos you already took.
You always see how many shots you have left.
- Step 4
Enjoy the album together
See everyone's photos as they arrive, by person, mission or hashtag. Heart your favourites, leave a wish for the hosts, and save any photo to your phone.
Ready to set up your album?
Questions first? Read the FAQ.